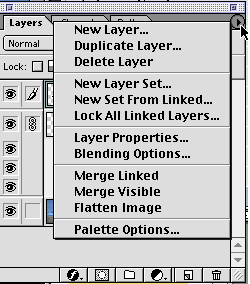

Layers:
 |
 |
It is a good idea to seperate every item: text, seperate images, into their own layers. You can only edit the layer you have selected (indicated by the little paintbrush icon). You can lock layers that you are not intending to work on to protect them. You can make layers visible and invisible by clicking on the eyeball next to the layer name. If you want, you can link two or more layers together, which is useful if you're using the "move" tool to reposition more than one thing at a time. To link layers, click in the "empty" box (where the paintbrush icon would be if the layer were selected), and a chain icon will appear, indicating this layer is now linked to the selected layer.
Layers can be moved around to change the stacking order of what is on top and what is on the bottom of your page. The upper layer being always on top of the lower.
You can also merge layers down to combine them:

At the top of the layers palette, you'll find the opacity
slider. This lets you make a layer translucent, which is a great feature.
Use it to ghost back type or layer images over one another. The slider goes
from 1 percent (barely visible) to 99 percent (barely translucent).
Next to the opacity slider is a pulldown menu for the blending modes that defaults to "normal." Though normal may be the ideal for many, go ahead and pull it down anyway. Below hides all the amazing compositing controls. As with filters, this is an area where experimentation is really the only way to see how powerful these controls can be. Use them in conjunction with the opacity slider and you can create some really interesting effects.
***always save a copy of your file before you flatten your layers down***. And then save a flat copy.
do some samples on local drive>>>