Navigation
Bars:
Dreamweaver will also help you make Navigation Bars.
There are four possible
states of an image that you can make:
1. Up (the normal state of the button)
2. Over (the mouse over state of the button)
3. Down (the state of the button when it is pressed)
4. Over While Down (When the user mouses over a pushed in button---not commonly
used)
Setting it up:
1. Make three images for
each navigation item. One for the Up state, one for the Over state, and one
for Down.
![]()
![]()
![]()
2. Click on Insert Navigation
Bar in the Insert Panel or choose Insert/Image Objects/Navigation Bar.

or

You will see this window:
(follow the steps below)
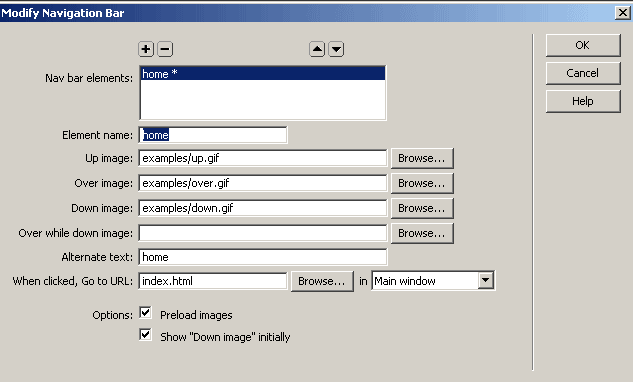
3. Enter an image Name to call the menu item (this won't show up)
4. Select the sources for all the images states.
5. Put in a URL if the image is linking somewhere when pressed.
6. Click on the + button, at the top of the window, to add more buttons
7. Always keep Preload images checked.
8. Check Show "Down Image" intially if you want the page to load with this selected. This is typical for a "home" button.
9. Choose Horizontal nav bar or Vertical nav bar
10. Check use tables if you want it to be in a table. This is useful.
11. Click ok.
 |